Final part of this series. We have a HTML form, we have the servlet class file ready. This tutorial focusses on getting the required JAR files to the TomCat server and doing some configurations to get the example working. The servlet code we provided earlier used Apache POI and OpenCSV libraries and generated a code to convert the input CSV to Excel format. Now that we have the class file ready, let us see how to provide a finishing touch to the servlet.
Step-4: Copy JAR Files to Support CSV to XLSX Servlet Code
- dom4j-1.6.1.jar
- xmlbeans-2.3.0.jar
- commons-fileupload-1.2.2.jar
- opencsv-2.3.jar
- poi-3.8.jar
- poi-ooxml-3.8.jar
- poi-ooxml-schemas-3.8.jar
- commons-io-2.4.jar
Make sure you copy all these files to the lib folder in your Tomcat server.
Step -5 :Configure Server Side Code to Support Conversion
You have to copy the entire form code to apache-tomcat-6.0.36\webapps\examples\servlets directory. The HTML form will reside in a folder named csv2xls. You can download the complete form code from the zip file below:
Next you need to copy the class files generated in Step-3. The class files needs to be copied to apache-tomcat-6.0.36\webapps\examples\WEB-INF\classes location
And you have to change the web.xml file in apache-tomcat-6.0.36\webapps\examples\WEB-INF path, to add the following entries:.
<servlet>
        <servlet-name>Csv2XlsServlet</servlet-name>
        <servlet-class>Csv2XlsServlet</servlet-class>
</servlet>
    .........

<servlet-mapping>
        <servlet-name>Csv2XlsServlet</servlet-name>
        <url-pattern>/servlets/servlet/Csv2XlsServlet</url-pattern>
</servlet-mapping>
The last change you have to make before you are ready to test, is to change the action on the form to point to this servlet. The code that needs to be changed in form.html is provided below:
Shutdown and restart the tomcat server following this. You are now ready to run the code!. <form id="form_533088" class="appnitro" enctype="multipart/form-data" method="post" action="/examples/servlets/servlet/Csv2XlsServlet">
If you have done everything right till this point, point your browser to the following URL:
http://localhost:8080/examples/servlets/csv2xls/form.html
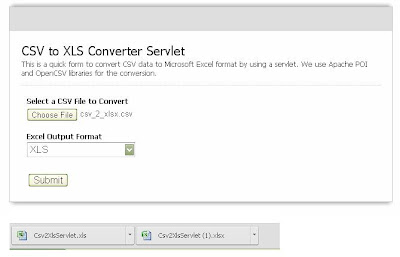
assuming 8080 is the port where your server runs. When you specify a CSV file and specify the output format, you will get either XLS / XLSX in the output, depending on your input. A sample output that was generated in my machine is shown below:
 |
| CSV to XLS - Java Servlet - Final Output - Example |
You can try generating both XLS and XLSX files from your input CSV file. Both the outputs are shown below. Happy converting.
That completes this tutorial series. If you are stuck or have a question, you can post it in the comments section of this blog post.
Download Complete Java Code - from Part 3 of this post - links below.
This Series: How to Convert CSV to XLSX using Java Servlet API Code?
Keywords: Convert CSV to XLS, Convert CSV to XLSX, Java Servlet Code Example, POI, OpenCSV, Apache Common library, Apache IO
All Parts:
Part 1 - Create HTML Form Required to Support Servlet Code
Part 2- Identify JAR files required - Write Servlet Side Code
Part 3- Complete Servlet Code to convert CSV to XLS / XLSX in Java
Part 4- Configure Server to support servlet - Download source files
No comments:
Post a Comment